First, we start with a butt cut to both open the tip (without yet removing tip material), reduce the table thickness, and make sure that the table is flat. Take a look at this picture and notice that one of the butt cuts on these No Name Early Babbitt (NNEB) blanks lowered the rear of the table such that there is a nick on the shank bulb. It's only cosmetic, but it doesn't look right and I try to avoid this. A really real Link Tone Edge has a shank shape that helps avoid this issue.
 The butt cut on the center mouthpiece was deep enough that the area just prior to the bulb was nicked. It isn't generally necessary to go this deep. The shank shape of a "real" Otto Link Slant Signature makes this issue easier to avoid. Maybe that's why it costs $1,200 more than our homemade Slant Signature.
Here is one way to avoid nicking the shank bulb when doing a butt cut. Wrap the bulb with a couple layers of masking tap. When it gets scuffed from the sandpaper, you have gone as far as possible.
 Getting close to the maximum butt cut.
 The tip of the mouthpiece hasn't been touched yet. This is a .024 feeler gauge. Based on what I see here, I can work the tip from a .070 to a .095 without ending up with a sharp tip or a radical change in the baffle.
After modifying the beak thickness (see Part 1) and the butt cut, we are ready for our facing curve.
To make an official Link Slant Signature, we will need the official numbers. This is the most difficult part. In fact, it might be impossible. Not because it is difficult to copy official facing numbers onto our blank. It is difficult because, unfortunately, the facing numbers do not exist. If you go to various websites and look at Otto Link tip openings, you might find some approximate agreement, but that is just the tip openings and not curvature numbers. Unfortunately, there isn't any agreement on exact Link curvatures.
In fact, there also isn't any real agreement on even the tip openings. What? But, you say, there are tables on the internet that show what a Link #7 tip opening is!! Yes, somebody posted something and others have copied it, and you have an official tip opening. But if you go back and do historical research, you will find advertising copy that says a Link #5 is "open" and nothing more from Link himself. You will also find that there is no agreement in the early measurements on what a Link #5 measures. Official standardized Link tip openings only came about when enough people copied a certain table most often. So tip opening charts are "internet truths."
On the table below, Mr. Eric Brand measured the vintage tenor Otto Link Tone Edge #4 as being 1.67 mm (.0657 inches). One of the common charts nowadays shows a tenor Link Tone Edge #4 as .075 inches (1.905 mm). It is really quite a difference. This isn't just a translation error between millimeters and inches. It likely means that the sizes on the side of the vintage mouthpieces only generally indicate the tip opening. Sort of like Link indicated in his advertisements of the era. A #3 was closed, #4 was medium, #5 was open, etc. The assertion that Link tip openings were in increments of 5/1000ths of an inch was made up by somebody other than Mr. Link. Otto probably knew that by stating an exact measurement he would be called out on this one, so he never made the assertions that are now made in every tip opening chart. And he knew, based on his claims of hard rubber "eburnation," that saxophone players can swallow a lot of bologna.
We could assume that the oldest tip opening and facing numbers that we can find are the most likely to be the "correct" vintage numbers. Many Slant Signatures have been modified or touched up so, if we use the newer numbers, how can we be sure that we are using "real" vintage Slant Signature numbers to make our "real" Slant Signature?
Here are the oldest numbers that I could find. These are from a 1938 publication written by the famous mouthpiece refacer Mr. Eric Brand. He provided these lay numbers for a Link #3, 4, and 5. At the time, the largest Link tip opening was the #6 "Hawkin's Special" at .090", but that was a huge tip opening that was ridiculously large and beyond what most players need or can handle.*

So what the heck do all those numbers mean? It is all explained in the publication. The bottom number is the tip opening in hundredths of a millimeter. Right away, there is something odd. At the top of the page are the numbers for the Otto Link metal tenor (the vintage Tone Master). At the bottom of the page are the numbers for the Otto Link rubber tenor (the vintage Tone Edge). The tip opening is the bottom number in each column. A Tone Master #5 has a 198 mm (.080 inch) and a Tone Edge #5 is 170 mm (.067 inch). So the table shows a considerable difference in tip openings between a Link metal #5 and a Link rubber #5 mouthpiece. Is the table wrong? Probably.
Below is another table from a 1940 Selmer catalog featuring information on quite a few brands and their tip openings. Let's compare a few. In the chart, the Link rubber 5* has a tip opening of .0729 inches. The Link metal 5* has a tip opening of .0768 inches. Nowhere in the modern tables found on the internet will you find a difference between rubber and metal Link tip openings. And nowhere will you find tip openings going out to an alleged accuracy of four digits, 1/10,000 of an inch. Which tables are wrong? It is probably safe to say "all of them."
 Visit the saxophone.org museum for this catalog at page 63 for a clearer picture.
Working up the columns in the 1938 publication from the tip opening are what we now call "Brand" numbers, named after Mr. Eric Brand. These indicate how far up a glass ruler a particular feeler gauge would slide, as in this blog. We are going to run into more problems using these numbers. Mr. Brand says that you won't need a feeler gauge larger than .050" because you won't have a tip opening much larger. Even on a vintage baritone Link Tone Master mouthpiece (bottom right hand corner), the Brand number for the .050 feeler gauge is the last measurement provided. Also note that although the #4* baritone has a larger tip opening than the #4, every feeler gauge slides in further for the #4 facing. Not likely.
Times have changed. These old tip opening numbers are like having 15" tires on your pickup truck. Nowadays, we need at least 22" wheels.
 Remember, bigger is better and nothing is too stupid.
We will have other problems working with these old Brand numbers. Look at the Otto Link "Rubber Tenor" numbers for the 4 and 5 tip in the 1938 publication. A number 4 tip opening is 1.67 mm. A number 5 is 1.70 mm. But the lay numbers given for #4 and #5 tip are identical! That would mean that the only difference is that the Link #5 takes an odd bend only right at the tip (like the baritone 4* numbers). The same oddity occurs in the metal tenor lay numbers, where a 3 tip (.058 inch) and a 4* tip (.066 inch) have the same Brand number for the final (.050 inch) feeler gauge. If you plot these numbers out on a graph, you will see that it is unlikely that they would produce a workable facing curve. Are these numbers wrong? Probably.
I think that we are going to have to resort to another source of Brand numbers for creating our real fake vintage new Otto Link Slant Signature Tone Edge. But first, look at the numbers provided above for the Rico tenor in 1938 (Rico mouthpieces were dropped from the 1940 catalog). At the time, these were the M.C. Gregory model mouthpieces (Mr. Gregory being one of Rico's employees). Some of the Brand numbers are given as + or -. I would guess that these mean the same as a finish carpenter calling out "Eight feet four and a three eighths inches, strong." Or "A skootch over eight feet four and three eighths inches." For all of the other Brand numbers, "whole numbers" (which are actually .5 millimeter increments) were sufficient. The + and - designations were just to give a little bit more accuracy, and not make believe accuracy like measurements to 1/10,000th of an inch.
We have to admit that we don't have a clue as to what the Link Slant Signature "Hawkin's Special" numbers are. Mr. Brand supplies curvature lays up to a #5 tip opening with an accuracy of only .5 mm increments. For larger tip openings, we don't really know. I've measured some pieces and they don't agree sufficiently to say exactly what are and are not official "Slant Signature" numbers. And then there are fine old Slant Signatures that have been refaced or touched up over the years. These are always claimed by their owners to have been improved over the original Link facing. There is also the effect of the mouthpiece wearing over time, sometimes from oxidation of the ebonite (I'll link to the blog when written).
It is certainly possible that a later refacing improved an original vintage Link facing. If you enter the old Brand numbers shown above into a computer spread sheet and produce a graph, you will see that those facing curves (allegedly original) are not perfectly smooth. In fact, some are a little lumpy, which doesn't mean that vintage Link's were intended to be lumpy. It is possible, of course, that a particular "lumpiness" is the trait that distinguishes a Link Tone Edge tenor from say a Rico M.C. Gregory tenor. There are different types of curves, most of them defined by algebraic formulas, but I have not found where "lumpiness" is a trait used by present day mouthpiece facers in describing their goal.
If you are reading this blog, you probably have access to a computer and, therefore, the ability to generate your own official "Link Slant Signature" numbers. With that in mind, here are some different numbers from the excellent website "Mouthpiece Works" provided by master mouthpiece facer Keith Bradbury. These numbers comprise a "computer aided" curvature and are given to the nearest 1/10th "Brand number," which would be 1/20th of a millimeter. As we have seen, Mr. Brand did not attempt this accuracy in his 1938 facing numbers. The exception might be the Rico line of mouthpieces for which Mr. Brand had numbers like 34+ and 10-, which would mean a "smidge more" than 34 and a "touch less" than 10. Brand was a well known and respected mouthpiece facer, so maybe that gives us a clue as to just how accurate the facing numbers need to be. Or, maybe, he was holding back on the super-secret numbers. Whatever. The Mouthpiece Works site gives us computer aided measurements in 1/20th of a millimeter instead of a skooch or a smidge.
Here are the numbers from Mouthpiece Works (more facings available to those who join the website). These are for a #6 Slant Signature "Hawkin's Special," which at the time of the early Slant Signature, was the largest Link tip opening at .090 inch. As it turns out, these are basically identical to the measurements that I get from measuring my own original vintage Hawkin's Special. And since our goal is to make a real vintage Otto Link Slant Signature Tone Edge, a #6 tip opening is as big as we can go. If anybody tries to sell you a Slant Signature with a tip opening larger than .090 inch, you now know that the mouthpiece has been ruined (according to Coleman Hawkins and Otto Link).
Instead of the 5 numbers given by Mr. Brand, Mr. Bradbury gives us 9 numbers and a computer graph for interpolation. Those are the numbers that I will use on my vintage NNEB Slant Signature. Starting at the top, after making sure that the table is flat, I create a lay so that the .0015" feeler gauge slides in 22.5 millimeters or a Brand number of 45. That is usually called the length of the facing. The next gauge thickness is .005" inserted to a Brand number of 39.6. A .010" gauge to 34.6. .016" gauge to 30.1. .024" gauge to 25.3.
If you are using a standard mechanic's set, you may not have the next thickness of .035. Simple enough. That measurement requires the use of two side-by-side blades, the .017 and the .018. Next we need .050, so we add .015 to .017 and .018. Then we need .063, which is again three blades stacked, the .020, .021, and .022. Next we need .078, so we stack four blades, .018, .019, .020, and .021. This is what would be done to come up with larger measurements if you were to go beyond a vintage Slant Signature (which seems to be the thing to do recently).
Keeping stacked blades as accurate as possible requires cleanliness and careful alignment (some of which is covered in this blog). You can achieve the accuracy of Otto Link and Eric Brand using the vintage mouthpiece facings shown above, but you won't be able to assert that your facing accuracy is to the billionth of a millimeter or 1/10,000 of an inch, as some will claim that they accomplish in their facing work. I'm going to write a blog on how to increase the accuracy of your feeler gauges and (when this shows up as a blue hyperlink) will link to it in the future.
Depending on the tip opening that we are starting with, our tip rail might become quite wide when putting on the new Link curvature (one reason to start with a butt cut when flattening the table). Below is a narrow tip opening changed to a new curve. I don't worry too much about what the actual tip opening is, in fact as we have seen, it tends to not matter very much, the accuracy of the curvature being way more important.** Any tenor piece that has a nice facing curve and a tip opening between .070 and .120 plays okay for me. (I still have the .135 tip opening shown below and it plays surprisingly easy. A huge tip opening is nothing special or difficult to play if the curvature is correct).
Reed choice makes a difference, but if the curvature is proper for the tip opening, the only obvious difference that I find between small and large tip openings is that the smaller tip openings can choke closed when I play at volume and the larger tip openings tend to "blat" when played at volume. Some players use harder reeds on small tips to get more "wood" sound and some players play softer reeds on large tip openings to get more "blat." It's the player's choice.

Now, what to do with a sharp tip rail. It really shouldn't look anything like the one shown above and below. Maybe something with about half that width. Even still, you may have reduced the thickness of the tip and created a sharp edge like this.


 Keep an old reed handy so that you get the shape to fit your choice of reed (although your choice of reed might change after some play testing of your new old real genuine fake vintage Slant Signature). A perfect matching of the reed curvature is not required, but it should conform to both the inside and outside of the tip rail.
 With this huge tip rail, I started with a riffler file to create a baffle while reducing the width of the rail.
I have shown my favorite method for finishing the tip rail in other blogs. I use a razor knife like this.
 Reducing the tip rail width and forming the baffle by scraping side-to-side with a razor knife. Using the right amount of pressure is required to reduce any "chattering," which leaves tiny grooves that have to be cleaned up. It also requires some skill to get the tip and rail intersection correct.
The vintage Slant Signature has a tiny roll-over baffle. It actually doesn't look like a baffle at all compared with most modern pieces. But they do tend to be more prominent than you will likely find on your stock NNEB. That little extra baffle and the little bit larger tip opening is the secret, assuming that you know how to eburnate the rubber on your NNEB blank. I'm just kidding.
You will have a little choice in choosing a baffle style after opening the tip. Smoothing out the one I've started above is about all that is required if I am making an official vintage Slant Signature. I simply get the tip rail shaped the way that I want and then scrape so that the flat area that I have made rolls down into the chamber (play testing along the way). If you make the tip opening larger than .090 inches, as in a later Link Tone Edge, then you can make a larger baffle, as was done in the Vibrator piece in Part 1. Of course, you could just buy a later Tone Edge.
In addition to the blanks noted above as starting points for making a Slant Signature, this Acousticut also works great. Also this model of Bundy, made by Babbitt using the alleged "Dukoff/Zimberhoff" blank (which might also have the identical "Link" chamber). Because of the Bundy name, these sell for hundreds less than the same chamber on a Dukoff or Link.

 The Bundy chamber.
 The Martin shield.
 Tiny baffle.
 Tiny #2 tip opening.
 The super secret real vintage Otto Link Slant Signature tone chamber.
 Or maybe this is my super secret Link Slant Signature tone chamber? It is actually the second one, but you have to flip it over and read the embossing to differentiate a Link Slant Signature from the Martin Handcraft shown in the first picture (or the Bundy and many other NNEB mouthpieces.
 I took careful measurements on the original Martin Handcraft mouthpiece.


 Here is the last Meyer Bros. blank that I bought. I had to compete against three other bidders for a winning bid of $2.50. The shipping cost was kind of high, but I bought it anyway. Now I have to decide whether to put on a 6 or 7 facing.
 You can see the compression mold line down the center of this ebonite piece. Later Martin 2 Star mouthpieces were more "plasticky" and were probably injection molded.
 The Martin 2 Star straight-sided chamber. Slightly larger than a vintage Brilhart.
We could assume that the oldest tip opening and facing numbers that we can find are the most likely to be the "correct" vintage numbers. Many Slant Signatures have been modified or touched up so, if we use the newer numbers, how can we be sure that we are using "real" vintage Slant Signature numbers to make our "real" Slant Signature?
Here are the oldest numbers that I could find. These are from a 1938 publication written by the famous mouthpiece refacer Mr. Eric Brand. He provided these lay numbers for a Link #3, 4, and 5. At the time, the largest Link tip opening was the #6 "Hawkin's Special" at .090", but that was a huge tip opening that was ridiculously large and beyond what most players need or can handle.*

At the bottom of the page above are the 1938 Brand facing numbers for Link hard rubber mouthpieces. You don't have to use Otto Link numbers on your Slant Signature. In fact, as we will see in a moment, any vintage Link mouthpiece that has been refaced no longer has an actual Link facing or a Link baffle. So the facing numbers shown above for the first Rico mouthpieces (often called M.C. Gregory mouthpieces) and others will work on a NNEB. But be careful if using the numbers shown above. Mr. Brand did not use the feeler gauge thicknesses that are now considered "standard" and there are obvious errors in the lay numbers that he provided.
So what the heck do all those numbers mean? It is all explained in the publication. The bottom number is the tip opening in hundredths of a millimeter. Right away, there is something odd. At the top of the page are the numbers for the Otto Link metal tenor (the vintage Tone Master). At the bottom of the page are the numbers for the Otto Link rubber tenor (the vintage Tone Edge). The tip opening is the bottom number in each column. A Tone Master #5 has a 198 mm (.080 inch) and a Tone Edge #5 is 170 mm (.067 inch). So the table shows a considerable difference in tip openings between a Link metal #5 and a Link rubber #5 mouthpiece. Is the table wrong? Probably.
Below is another table from a 1940 Selmer catalog featuring information on quite a few brands and their tip openings. Let's compare a few. In the chart, the Link rubber 5* has a tip opening of .0729 inches. The Link metal 5* has a tip opening of .0768 inches. Nowhere in the modern tables found on the internet will you find a difference between rubber and metal Link tip openings. And nowhere will you find tip openings going out to an alleged accuracy of four digits, 1/10,000 of an inch. Which tables are wrong? It is probably safe to say "all of them."
 Visit the saxophone.org museum for this catalog at page 63 for a clearer picture.
Working up the columns in the 1938 publication from the tip opening are what we now call "Brand" numbers, named after Mr. Eric Brand. These indicate how far up a glass ruler a particular feeler gauge would slide, as in this blog. We are going to run into more problems using these numbers. Mr. Brand says that you won't need a feeler gauge larger than .050" because you won't have a tip opening much larger. Even on a vintage baritone Link Tone Master mouthpiece (bottom right hand corner), the Brand number for the .050 feeler gauge is the last measurement provided. Also note that although the #4* baritone has a larger tip opening than the #4, every feeler gauge slides in further for the #4 facing. Not likely.
Times have changed. These old tip opening numbers are like having 15" tires on your pickup truck. Nowadays, we need at least 22" wheels.
 Remember, bigger is better and nothing is too stupid.
I think that we are going to have to resort to another source of Brand numbers for creating our real fake vintage new Otto Link Slant Signature Tone Edge. But first, look at the numbers provided above for the Rico tenor in 1938 (Rico mouthpieces were dropped from the 1940 catalog). At the time, these were the M.C. Gregory model mouthpieces (Mr. Gregory being one of Rico's employees). Some of the Brand numbers are given as + or -. I would guess that these mean the same as a finish carpenter calling out "Eight feet four and a three eighths inches, strong." Or "A skootch over eight feet four and three eighths inches." For all of the other Brand numbers, "whole numbers" (which are actually .5 millimeter increments) were sufficient. The + and - designations were just to give a little bit more accuracy, and not make believe accuracy like measurements to 1/10,000th of an inch.
We have to admit that we don't have a clue as to what the Link Slant Signature "Hawkin's Special" numbers are. Mr. Brand supplies curvature lays up to a #5 tip opening with an accuracy of only .5 mm increments. For larger tip openings, we don't really know. I've measured some pieces and they don't agree sufficiently to say exactly what are and are not official "Slant Signature" numbers. And then there are fine old Slant Signatures that have been refaced or touched up over the years. These are always claimed by their owners to have been improved over the original Link facing. There is also the effect of the mouthpiece wearing over time, sometimes from oxidation of the ebonite (I'll link to the blog when written).
It is certainly possible that a later refacing improved an original vintage Link facing. If you enter the old Brand numbers shown above into a computer spread sheet and produce a graph, you will see that those facing curves (allegedly original) are not perfectly smooth. In fact, some are a little lumpy, which doesn't mean that vintage Link's were intended to be lumpy. It is possible, of course, that a particular "lumpiness" is the trait that distinguishes a Link Tone Edge tenor from say a Rico M.C. Gregory tenor. There are different types of curves, most of them defined by algebraic formulas, but I have not found where "lumpiness" is a trait used by present day mouthpiece facers in describing their goal.
If you are reading this blog, you probably have access to a computer and, therefore, the ability to generate your own official "Link Slant Signature" numbers. With that in mind, here are some different numbers from the excellent website "Mouthpiece Works" provided by master mouthpiece facer Keith Bradbury. These numbers comprise a "computer aided" curvature and are given to the nearest 1/10th "Brand number," which would be 1/20th of a millimeter. As we have seen, Mr. Brand did not attempt this accuracy in his 1938 facing numbers. The exception might be the Rico line of mouthpieces for which Mr. Brand had numbers like 34+ and 10-, which would mean a "smidge more" than 34 and a "touch less" than 10. Brand was a well known and respected mouthpiece facer, so maybe that gives us a clue as to just how accurate the facing numbers need to be. Or, maybe, he was holding back on the super-secret numbers. Whatever. The Mouthpiece Works site gives us computer aided measurements in 1/20th of a millimeter instead of a skooch or a smidge.
Here are the numbers from Mouthpiece Works (more facings available to those who join the website). These are for a #6 Slant Signature "Hawkin's Special," which at the time of the early Slant Signature, was the largest Link tip opening at .090 inch. As it turns out, these are basically identical to the measurements that I get from measuring my own original vintage Hawkin's Special. And since our goal is to make a real vintage Otto Link Slant Signature Tone Edge, a #6 tip opening is as big as we can go. If anybody tries to sell you a Slant Signature with a tip opening larger than .090 inch, you now know that the mouthpiece has been ruined (according to Coleman Hawkins and Otto Link).
| 45.0 |
| 39.6 |
| 34.6 |
| 30.1 |
| 25.3 |
| 19.8 |
| 13.6 |
| 9.0 |
| 4.2 |
Instead of the 5 numbers given by Mr. Brand, Mr. Bradbury gives us 9 numbers and a computer graph for interpolation. Those are the numbers that I will use on my vintage NNEB Slant Signature. Starting at the top, after making sure that the table is flat, I create a lay so that the .0015" feeler gauge slides in 22.5 millimeters or a Brand number of 45. That is usually called the length of the facing. The next gauge thickness is .005" inserted to a Brand number of 39.6. A .010" gauge to 34.6. .016" gauge to 30.1. .024" gauge to 25.3.
If you are using a standard mechanic's set, you may not have the next thickness of .035. Simple enough. That measurement requires the use of two side-by-side blades, the .017 and the .018. Next we need .050, so we add .015 to .017 and .018. Then we need .063, which is again three blades stacked, the .020, .021, and .022. Next we need .078, so we stack four blades, .018, .019, .020, and .021. This is what would be done to come up with larger measurements if you were to go beyond a vintage Slant Signature (which seems to be the thing to do recently).
Keeping stacked blades as accurate as possible requires cleanliness and careful alignment (some of which is covered in this blog). You can achieve the accuracy of Otto Link and Eric Brand using the vintage mouthpiece facings shown above, but you won't be able to assert that your facing accuracy is to the billionth of a millimeter or 1/10,000 of an inch, as some will claim that they accomplish in their facing work. I'm going to write a blog on how to increase the accuracy of your feeler gauges and (when this shows up as a blue hyperlink) will link to it in the future.
Depending on the tip opening that we are starting with, our tip rail might become quite wide when putting on the new Link curvature (one reason to start with a butt cut when flattening the table). Below is a narrow tip opening changed to a new curve. I don't worry too much about what the actual tip opening is, in fact as we have seen, it tends to not matter very much, the accuracy of the curvature being way more important.** Any tenor piece that has a nice facing curve and a tip opening between .070 and .120 plays okay for me. (I still have the .135 tip opening shown below and it plays surprisingly easy. A huge tip opening is nothing special or difficult to play if the curvature is correct).
Reed choice makes a difference, but if the curvature is proper for the tip opening, the only obvious difference that I find between small and large tip openings is that the smaller tip openings can choke closed when I play at volume and the larger tip openings tend to "blat" when played at volume. Some players use harder reeds on small tips to get more "wood" sound and some players play softer reeds on large tip openings to get more "blat." It's the player's choice.

¡Aye, caramba! Look at that tip rail. This is not one of my DIY Slant Signature projects using a NNEB. I was just messing around taking a vintage .060 tip opening to a .135 tip opening (on a Buffet Crampon mouthpiece). As you can see, it's not just the tip rail that gets wider, the side rails gain width and are further apart. There is a huge amount of chamber work and even exterior shaping required to get this thing back into shape. Yet another reason to not go crazy with your new tip opening. Most vintage NNEB pieces are in the .070 range and going to .090 (Link 6) is all you need (unless you need bragging rights).

Христос на велосипеде! That's a sharp tip! Keep in mind that this is still my gigantic tip opening change as shown above. Often times, a NNEB has enough material on the tip so that it isn't necessary to reshape the area. It will be thinner, but not necessarily as sharp as this one. This one has to be rounded off.

Here it is rounded off. I've read a few places that this will affect the tuning of the piece because it is now shorter. Ignore those claims. I have actually shortened the above piece by 1.5 mm and I will soon increase the chamber by a tiny amount when I rework the baffle. So it might tune .035 MHz sharper (or flatter). The mouthpiece might have to be placed differently on the cork .4 mm further (or .4 mm less) in order to tune. If you are still worried, you should not be reading this blog.
 Keep an old reed handy so that you get the shape to fit your choice of reed (although your choice of reed might change after some play testing of your new old real genuine fake vintage Slant Signature). A perfect matching of the reed curvature is not required, but it should conform to both the inside and outside of the tip rail.
 With this huge tip rail, I started with a riffler file to create a baffle while reducing the width of the rail.
 I have shown my favorite method for finishing the tip rail in other blogs. I use a razor knife like this.
 Reducing the tip rail width and forming the baffle by scraping side-to-side with a razor knife. Using the right amount of pressure is required to reduce any "chattering," which leaves tiny grooves that have to be cleaned up. It also requires some skill to get the tip and rail intersection correct.
The vintage Slant Signature has a tiny roll-over baffle. It actually doesn't look like a baffle at all compared with most modern pieces. But they do tend to be more prominent than you will likely find on your stock NNEB. That little extra baffle and the little bit larger tip opening is the secret, assuming that you know how to eburnate the rubber on your NNEB blank. I'm just kidding.
You will have a little choice in choosing a baffle style after opening the tip. Smoothing out the one I've started above is about all that is required if I am making an official vintage Slant Signature. I simply get the tip rail shaped the way that I want and then scrape so that the flat area that I have made rolls down into the chamber (play testing along the way). If you make the tip opening larger than .090 inches, as in a later Link Tone Edge, then you can make a larger baffle, as was done in the Vibrator piece in Part 1. Of course, you could just buy a later Tone Edge.
In addition to the blanks noted above as starting points for making a Slant Signature, this Acousticut also works great. Also this model of Bundy, made by Babbitt using the alleged "Dukoff/Zimberhoff" blank (which might also have the identical "Link" chamber). Because of the Bundy name, these sell for hundreds less than the same chamber on a Dukoff or Link.

 The Bundy chamber.
Below is a No Name Early Babbitt that does have a name embossed on it. These came standard with the Martin Handcraft up until 1942-43, when Martin changed to a flat sidewall style of chamber for the new Martin Centennial. The Handcrafts tend to be a little more expensive than the NNEB pieces that I showed above just because of the name stamped on them. This one was $41 with shipping. That is the most that I've ever paid for a vintage Link chamber. But, it is very clean and I play a Martin Handcraft tenor, so I had to have it for making a real fake official new vintage Otto Link Slant Signature Tone Edge disguised as a Martin Handcraft.***
 The Martin shield.
 Tiny baffle.
 Tiny #2 tip opening.
 The super secret real vintage Otto Link Slant Signature tone chamber.
 Or maybe this is my super secret Link Slant Signature tone chamber? It is actually the second one, but you have to flip it over and read the embossing to differentiate a Link Slant Signature from the Martin Handcraft shown in the first picture (or the Bundy and many other NNEB mouthpieces.
With a new facing, I'll have Martin Handcraft on the outside and vintage Otto Link Slant Signature on the inside. The difference right now is that the Martin has a #2 facing. That measures a .058 inch opening with a Brand number lay of 45.5. That is an extremely long lay for such a tiny tip on a tenor mouthpiece!! For comparison, the smallest vintage Link Tone Edge tenor opening (in the 1930's) as shown in the table above was a 3* at .061 inches (later changed to .070 on modern Links) and a lay number of 43.
 I took careful measurements on the original Martin Handcraft mouthpiece.
Above is a graphic representation of the curve on this old Martin mouthpiece. The yellow line is curve created by the Brand numbers given earlier for a vintage Link #6. The green and blue lines are the left and right rail of my vintage Martin Handcraft carcass. The original lay is too long and, even worse, the curve is too "flat" because too much material has been removed in the middle of the curvature. This is the type of lay that is easy to play at low volume and with little character. Perfect for a beginner.
There is a problem with the blue and green lines overlapping. That means that the table tips one direction, then at about the .010 feeler gauge they are even, then the lay tips the other direction all the way to the tip. This is definitely going to add "resistance," though not necessarily in a good way. The lay remains steadily "off kilter" for a long way, making the mouthpiece perfectly playable, but maybe uninspiring. Keep in mind that for this mouthpiece (and many, many others) this is the first time it has been subject to such exact measurement. I would be surprised if it received more than 5 minutes of personal attention during the application of the initial lay. I just spent 20 minutes measuring and graphing the lay.
Even with a #3 reed, the Martin Handcraft closed right up as soon as I tried to get any volume. I would need to find a #7 reed to actually play the old Martin #2. Instead, I'll just turn it into a $41 genuine vintage Otto Link Slant Signature Hawkin's Special Tone Edge. The Martin will require a slight "butt cut" that will both shorten the lay and bring the middle of the curve (usually the .024" and .035" feeler gauges) down enough so that I can copy the facing from my original Slant Signature #6. Since one rail was consistently higher than the other, I also canted the table slightly as I flattened and made my butt cut.
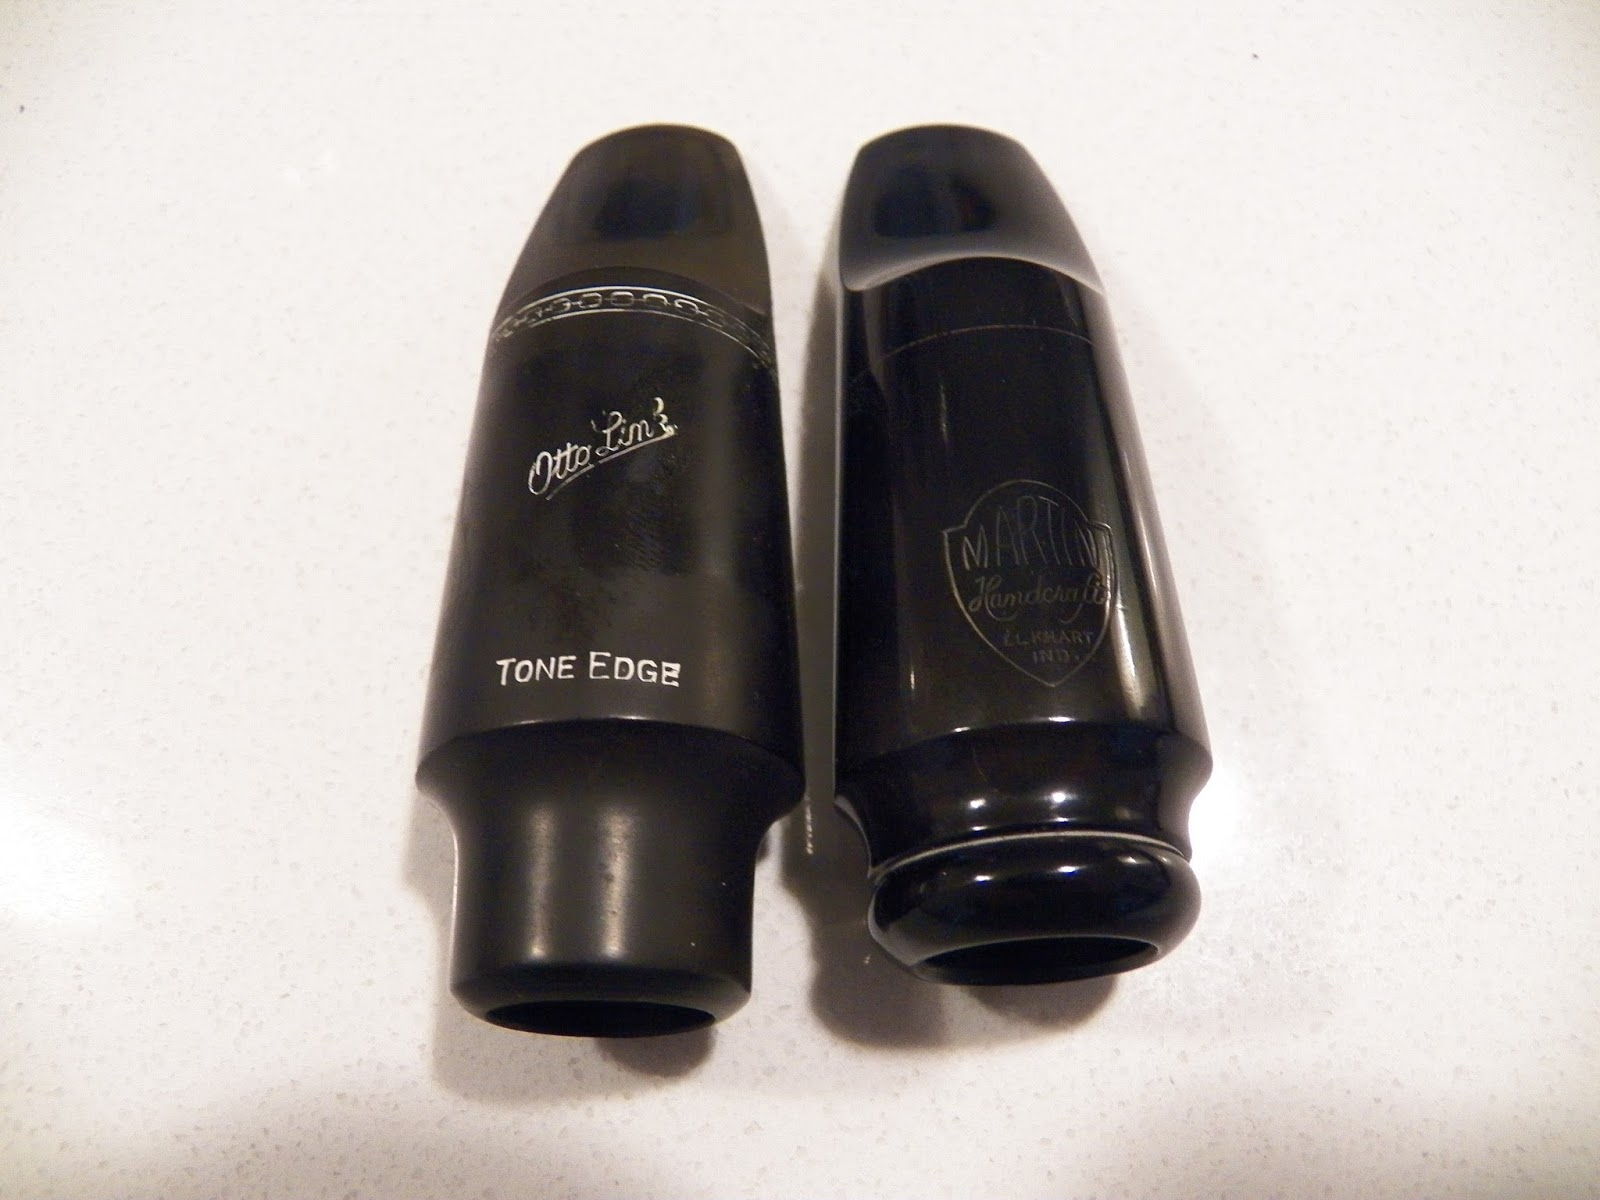
They will still look very different on the outside. Notice that the Handcraft has a shorter, and therefore steeper beak. I am not going to modify the thickness of the beak on this piece, so it will always have different playing characteristics even if the lay and chamber are identical. Although the inside shank bore meets the chamber in the same place on both pieces, the Martin has a shorter exterior shank. Therefore it will slide onto the cork differently, i.e., not as far. It will look like it tunes differently based on the cork placement, but actually you will be placing the chamber and tip distance in the identical location. It is the chamber volume and tip distance the tunes, not the exterior length of the shank, i.e., not how it looks on the cork.

Here is my Martin Handcraft (late 1930's) compared to a vintage Babbitt that does have a name. The Babbitt Artist, although it looks older, is from the mid-1960's when Babbitt first started putting the Babbitt name on its mouthpieces. Again, the Martin has a shorter and therefore steeper beak. The Babbitt Artist beak is longer, thinner, and appears to be identical to the vintage Slant Signature dimensions (except for the shank). For info on how beak shape can have an acoustical effect, check out this blog.

Here they are both opened up a little. I gave the Martin (on the left) a shorter, but more pronounced baffle. I might thin the tip rail a little more, but I like the way that it plays now. It subtones super easy, in fact, that is sort of its default mode when played softly.
The goofy original lay on the Martin Handcraft was just a slight wrinkle in copying the facing from the vintage Link #6 Tone Edge on to the Martin. But it is mainly the chamber shape that interests us. Which makes me wonder. How many different chamber plugs did Babbitt have during this time? Would it make any economic sense for Otto Link to fabricate its own proprietary chamber plug(s) for Babbitt to use when fabricating the Tone Edge blanks for Mr. Link? Babbitt already had on hand what appears to be the identical chamber plug(s).
Of course, it would not likely be a single Otto Link chamber plug. The present Babbitt website still shows the mold style that it uses (click on "rubber molding"). Its molding process consists of a plate pressing 3 or 4 rubber blanks at a time. Each mouthpiece would have its own chamber plug. Are those 3 or 4 chamber plugs absolutely identical? Probably close, but the fact is that each pressing is unlikely to create 4 identical mouthpieces. Add to that the idiosyncrasies produced by finishing the mouthpiece and it makes sense that players who have the luxury of play testing a selection of the same Link model claim that there are differences and choose a favorite.
Of course, another player might choose a different one. The present lore is that the "modern" JJ Babbitt Otto Links vary from one to the next. But when have you ever heard a review from a player that comparison tested ten or twelve brand new Link Tone Edges in 1940? Variations from mouthpiece to mouthpiece have likely always existed.
It is possible that the post-manufacture finish work is the only real difference between the multitude of NNEB blanks and the vintage Otto Link. If we can't detect any significant difference between a NNEB chamber and a vintage Link, was there really a unique "Link Tone Chamber" as claimed in old Link advertising? Or was that just another pile of eburnation?
P.S. I realize that the vintage Link Slant Signature Tone Edge sell for crazy prices for tenor pieces. For alto, not so much. If you want to really over-spend for a vintage alto mouthpiece, you need to look at old Meyer Brothers mouthpieces, either a 5M or 6M, usually in a medium chamber. Probably somebody famous played a Meyer 5M or 6M. That's all it takes to drive up prices. The theory is that you will also sound like XXX (the famous player) if you only had a mouthpiece that you believe to be an original vintage Meyer 5M or 6M similar to the one allegedly played by XXX. Truth is, if you want to play like XXX, you need to smoke the same cigarettes as XXX.
Other finishing businesses besides Meyers used the same alto blanks, but they are kind of rare compared to the NNEB style blanks. Like vintage Link Slant Signature blanks and vintage Rico M.C. Gregory blanks, the vintage Meyer Brothers alto blanks are also under the radar and can be inexpensive ($25 to $50). But that is for another blog.
If you can't wait for the blog, you can go on Ebay and compete with the 53 bidders for this Meyer alto piece.

I think that the winning bidder spent $2,200 too much. Hope she now plays like XXX.
 Here is the last Meyer Bros. blank that I bought. I had to compete against three other bidders for a winning bid of $2.50. The shipping cost was kind of high, but I bought it anyway. Now I have to decide whether to put on a 6 or 7 facing.
* It is common for a seller to stamp a vintage Link other than a #6 facing with "H.S." or "Hawkins Special," thereby increasing the value of the old Link by hundreds of dollars. This is even more lucrative than stamping an A or T on an old ligature to make it an official "Link" ligature. But Otto Link advertising only referred to the #6 as the "Hawkins Special."
** If you tell a guy that you got a new mouthpiece, the first question you will hear is "what tip opening?" If you tell a gal that you bought a new car, the first question you will hear is "what color." Women get ridiculed about this, but the man's question is just as ridiculous.
*** I also play a 1942 Martin Centennial tenor. Those mouthpieces, like the Centennial model itself, are not common. Martin started providing a different Babbitt-produced mouthpiece design with the Centennial and on later saxophones, more like a Brilhart design with straight sidewalls. These are not my favorite. It is commonly known as the "Martin 2 Star" mouthpiece, but because only the first two years were stamped "Centennial" on the shank, those pieces are claimed to be rare. The seller was asking $1,000 for this common mouthpiece blank (later reduced to $399 and still didn't sell). I would pass at $50. At $12, I would probably bid because it is the original for my saxophone. But remember, if you have a 1942 automobile, the original tires (even though made with that super-special vintage rubber) are probably not the best for performance.
 You can see the compression mold line down the center of this ebonite piece. Later Martin 2 Star mouthpieces were more "plasticky" and were probably injection molded.
 The Martin 2 Star straight-sided chamber. Slightly larger than a vintage Brilhart.
This post and blog are what makes the internet an amazing place. Thanks!
ReplyDelete