Lacquer, i.e., the most frivolous aspect of saxophone ownership, gets the most attention. Will you play better if your lacquer is better? I doubt it. But this blog is going to be about your inner-self. Actually, your horn's inner-self. I've torn apart and rebuilt enough saxophones that I know that it's what's inside that counts. And I really mean what counts. What is inside your horn, stuff that you don't know about, will really, really effect the way your horn plays. People talk about whether a re-lacquer effects the way a horn plays. It is a complex issue with lots of hyperbole and folk lore. But what's inside your horn will absolutely effect the way the horn plays, yet nobody talks about that.
Every new player gets the admonition about swabbing out their horn when they are done practicing. Good advice, often ignored. So what bad stuff happens to the horn that isn't swabbed regularly? The same thing that happens to the swabbed horn, just much faster. Even a horn that is taken care of suffers over time. Here, I'm talking about quite a bit of time. Since I generally work on older horns (1920's-40's), I often see stomach-turning filth, and some of it is on well maintained horns. Think of it like brushing your teeth. It's a great idea, but when you're 100 years old you probably will have some issues even if you brush just like your dentist says. Same with swabbing a sax. It will also need a periodic deep cleaning.
One of my recent repads was a 1951 Conn 10M. Compared to most horns that I've worked on, that's a new horn. I always look inside when I take them apart and this one was normal. There was stuff. Stuff that wouldn't come out with a swab. I have a stainless steel wire bottle brush that has adjustable bristles. I can make it narrow or as wide as a wine bottle. Perfect for cleaning the inside of the body tube after all the key mechanisms are removed. Here is a view down the bell.

See that little pile of stuff down in the bow? That's what came loose from the body tube with a little brushing. Here's a different angle of what was in the bow. This picture isn't the bottom of the bow, where stuff really accumulates, this is just what the sides of the body tube looked like.

This stuff was also in the neck. It is formed by condensation attracting dust and stuff over the years. How can that not effect the way the horn sounds? Who cares if the horn is a re-lacquer on the outside if this is what's on the inside?
Here is a picture of some of the stuff that I got out of the neck and the horn. Notice that there is a little yellow plastic piece, probably originally from covering the octave mechanism that activates the neck pip. That came out when I brushed out the horn. It had fallen off and was cemented inside of the horn with all of the other gunk.

Because some of the stuff wouldn't come loose with just a brushing, I used my abrasive blaster and soda (a relatively mild abrasive) to blast out the stubborn stuff. Here's a picture of what I had to blast out. This is after I had gone through the tube with the stainless steel bristle bottle brush, so this stuff is really stuck on. Once it gets to this point, pulling a swab through the horn won't get this stuff out.

The picture above isn't the bow. It's crusty stuff on the side wall of the body tube when looking in through one of the lower tone hole chimneys. With all of the keys off, I was able to blast the entire tube. Soda is abrasive enough to remove this scale but doesn't leave a rough or satin finish like sand and a much smoother surface than the chunks of stuff that was stuck on the inside of this horn.
I have never just cleaned out the insides of an old horn without rebuilding everything else. A cleaning like this requires that the keys are removed, and if they are removed, then the horn is repadded, the keys are swedged, the full works. So I don't know how much of the improvement in the horn's performance is due just to removing the fuzzy, crusty crumbles from the interior. I have to believe that a layer of scale can't be good.
The next items to clean are the pads and tone holes. Since I always have the horn completely stripped down, I really don't ever clean a pad off and use it over again. It's just not worth it. I'll use an analogy. I pull the engine out of my car and completely rebuild it. But I save the old motor oil and Brand X oil filter because they look okay and I don't know how many miles are on them. That saves me $15. Really? Have you ever heard of anybody doing that?
An entire set of excellent quality pads and resonators are about $100 on a tenor. If the horn is taken care of, they should last over 10 years. That's less than $10 a year to play on good pads. Of course, if you don't work on your own horn and install the pads yourself, it costs more. Still, if you have a technician repad your horn, ask about pads. Do you really want to save a few bucks by having the tech use duck leather pads from Ukraine?
Here is one of the issues with old pads. This is verdigris.

Verdigris is kind of a generic name for a green layer of corrosion that forms on metal alloys containing copper. Citric acid, chloride, whatever, can form verdigris. It can occur simply from salts, acids, and gases in the environment. And moisture helps. It tends to be a blend of copper acetate, copper carbonate and, if near the ocean, copper chloride. Other tarnish colors are caused by other acids, but the term verdigris (vert-de-Grece or "Green of Greece) is the common term. Verdigris is not a uniformly smooth layer, and that is a problem on a tone hole rim.
 Verdigris (and maybe a little mildew) has destroyed this pad.


Right in the center of the picture is an area that isn't completely shiny after being lightly lapped and taking care to keep the lap file perfectly flat to the tone hole chimney. The combination of leather, copper, spit, and who knows what else had, over the years, caused some metal loss. That area doesn't shine when the chimney is carefully lapped. It doesn't take much of a pad seat in the leather to hide this size leak, but the leather isn't going to form itself to the little pitted area. The tone hole needs to be filed down a tiny amount and all is good.
Except for one problem. I will now have clean raw brass directly against a new leather pad. And I will have moisture. By taking good care of my horn I can minimize the amount of time moisture is present, but I can't eliminate it.
What I have done in the past is to cut to the chase and corrode the newly exposed brass so that it won't further corrode. It's similar to the anodized finish that is put on aluminum to prevent further corrosion. I need to corrode the copper with something so that no raw copper is exposed to acetic acid, etc. (the common causes of verdigris). What I have used is a mixture of selenic acid and phosphoric acid. It is the same stuff that I used on another blog to produce a brownish patina on the whole horn. Although that horn is un-lacquered brass, there has been absolutely no verdigris formed on the patina surface in 6 years. Not on the inside, not on the tone hole chimneys.
Shortly after putting the patina on that horn, I leveled some tone holes and was concerned about the leather/raw brass issue. Leveling the tone holes produces a sharp edge. I run bronze wool around them to round them over a little bit and get rid of any sharp burrs. Not a rolled tone hole exactly, just an edge that is friendlier to the leather. Be careful, as brass wool is just hard enough to scratch lacquer.


 Verdigris (and maybe a little mildew) has destroyed this pad.
It can also be a problem because it comes loose and attaches to the pad leather. The picture above is what heavy verdigris looks like on a pad. It can be cleaned off in an effort to get a smooth surface that will seal, but don't bother. The damage has been done. The crystals are not just on the surface. The moisture that helps verdigris form also carries the verdigris into the leather. People who use leather in mechanical applications (think horse harnesses), have know for years about the deterioration of leather caused by verdigris on brass rivets. The tanning process tends to leave residual chemicals that accelerate verdigris. (If you want to see how pad leather can fail while looking perfect, check out this blog.)

The affected leather on this holster can been cleaned and the verdigris on the surface removed, maybe even the verdigris formed in the moist leather, but the structural damage has been done by the crystalline structure of the verdigris. The leather has lost its strength and suppleness. Likewise, leather effected by verdigris around a saxophone pad seat might look like the pad is sealing, but the actual seat area will have been compromised.
Speaking of supple, go back and look at the pad shown at top left in the third picture. See the couple of "water spots" on it? Sometimes that is just a stain and sometimes that discoloration indicates a hard spot on the leather. Check those spots carefully and decide whether you want to save a pad like that.
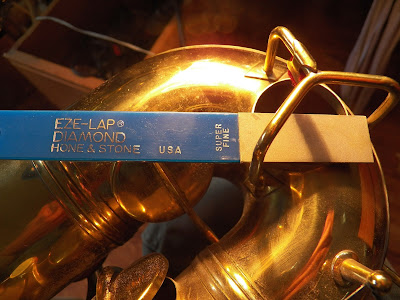
You will also need to look closely at any tone hole chimney that has a layer of verdigris. The amount of copper that makes the green patina may be minuscule, but it may also be enough to effect the sealing ability of the tone hole. I use a flat diamond lap file, often used for sharpening carving knives, to gently put a shine on the tone hole. That way I can use a magnifying glass to see if the tone hole is level.


Right in the center of the picture is an area that isn't completely shiny after being lightly lapped and taking care to keep the lap file perfectly flat to the tone hole chimney. The combination of leather, copper, spit, and who knows what else had, over the years, caused some metal loss. That area doesn't shine when the chimney is carefully lapped. It doesn't take much of a pad seat in the leather to hide this size leak, but the leather isn't going to form itself to the little pitted area. The tone hole needs to be filed down a tiny amount and all is good.
Except for one problem. I will now have clean raw brass directly against a new leather pad. And I will have moisture. By taking good care of my horn I can minimize the amount of time moisture is present, but I can't eliminate it.
What I have done in the past is to cut to the chase and corrode the newly exposed brass so that it won't further corrode. It's similar to the anodized finish that is put on aluminum to prevent further corrosion. I need to corrode the copper with something so that no raw copper is exposed to acetic acid, etc. (the common causes of verdigris). What I have used is a mixture of selenic acid and phosphoric acid. It is the same stuff that I used on another blog to produce a brownish patina on the whole horn. Although that horn is un-lacquered brass, there has been absolutely no verdigris formed on the patina surface in 6 years. Not on the inside, not on the tone hole chimneys.
Shortly after putting the patina on that horn, I leveled some tone holes and was concerned about the leather/raw brass issue. Leveling the tone holes produces a sharp edge. I run bronze wool around them to round them over a little bit and get rid of any sharp burrs. Not a rolled tone hole exactly, just an edge that is friendlier to the leather. Be careful, as brass wool is just hard enough to scratch lacquer.

I then apply my acid wash over the newly exposed brass using a Q-Tip. I've already done it in the picture below, and it's basically invisible. It doesn't effect the surrounding lacquer and simply takes the sheen off of the exposed brass. It "corrodes" the brass to a soft brown color and, so far (10 years), does not subsequently generate any green crud.

Now I have a surface that is clean, flat, and resistant to verdigris. With the keys off, I can clean and inspect the inside. Time to repad. AND THEN KEEP THE HORN CLEAN.
Would you post a picture of (or maybe a link for) this adjustable bottle brush??
ReplyDeleteAlso, how do you go about soda blasting the bore? is it through the open tone holes or some kind of angled nozzle?
Do you load a conventional sand blaster with baking soda (is that all there is to it?)
Thanks for the great posts.
Both the wire brush and the soda blasting have to be done when the horn is completely stripped down. The wire brush will tear up the pads if it were to be used with the pads still on. The nozzle of my blasting gun would not fit and I wouldn't be able to get good coverage with the pads on. It is still difficult even with the pads on.
ReplyDeleteI tried to Google to find the wire brush that I have and couldn't find one on the internet. I bought it years ago at a wine making shop. The little blasting gun that I use is like this one.
http://www.harborfreight.com/21-oz-hopper-gravity-feed-spot-blaster-gun-95793.html
The media is basically baking soda, but a box of baking soda might not be enough to do a tenor. For a few dollars more, I can get a 50# bag at my local Kleen Blast. A bag has lasted me for years and I use it on other projects. It's messy and you need to wear a particle mask.
This comment has been removed by the author.
ReplyDelete